Introduction

The big bar at the bottom (by default) of your Mac’s screen is called the Dock. When you first get your Mac there will be a number of icons in it. Most of these are icons for applications but there are other kinds as well. The Dock can be a bit confusing at first; this guide will make it more clear.
The Dock is split into two sections separated by a thin, vertical line. Each section has its own use.
The Application Section
The left section contains application icons. You’ll see some such as Finder and Dashboard. You can click on these icons to launch the applications they represent.
If an application is already running you will see a black triangle beneath its icon. In this case clicking the icon will bring the application to the front.
If you open an application that does not already have an icon in the Dock a temporary icon will be placed at the end of the application section as long as the application is running. When you quit the application the icon will disappear.
You can add icons to this section in two ways. The first way is to simply drag an application from the Finder into the application section of the Dock. The second is to open the application and then while it’s running Ctrl+Click the temporary icon and click “Keep in Dock.” This will keep the icon in the Dock even after you quit the application.
To remove an icon just drag it from the Dock to anywhere else on the screen. The icon will disappear in a puff of smoke.
The Document/Window Section
The section to the right of the dividing line is used for two things: file and folder links and minimized windows.
Files and folders can be dragged into this section from the Finder. This creates an icon that can be used to quickly open the file or folder. To remove the icon just drag it off of the Dock.

Windows can also be put into the Dock. To minimize an open window click the yellow circle with the “-” in the upper left corner of the window. The window will be hidden from view and placed in the Dock. To restore the window click its icon.
Trash

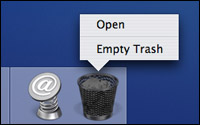
At the far right of the Dock is the Trash icon. This icon acts differently than the other icons. Files and can be dragged to the Trash. The Trash can be emptied and the files deleted by Ctrl+Clicking on the Trash icon and selecting “Empty Trash.”
Customizing
The Dock can be customized by going to the “Dock” section of System Preferences. There are several options than can be used to make the Dock behave exactly as you want.